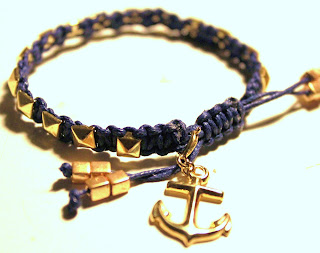
DIY PROJECT #8: THE STUDDED CHARM BRACELET
While digging through a basket of vintage earrings at an antique mall in Innisfil, Ontario, I can across these beauts:
Cute, indeed.
I like how this one is casual. Good for those nautical outfits in the summer. Easy to layer for arm parties. It's an adjustable macrame bracelet, which I decided to stud in order to add more pizzazz. It's super easy to make, and takes about 45 minutes if you've never made one of these before. The great thing is that if you don't want a charm on it, it's easily removed because it's attached with a lobster clasp.
So what do you need?
- a charm
- wax cotton cord, about a 3/4 of a yard
- studs
- gold beads (I used square ones)
- E6000 glue
- pliers
Step 1: Make a macrame bracelet to fit around your write. For the tutorial refer to DIY Project #6.
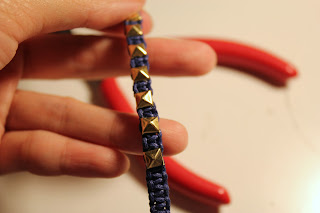
Step 2: Once you finish your bracelet, snip the excess off the ends and dab some glue to keep it in place. To stud, you'll need pliers. A stud has four prongs on its back. In order to attach it to any surface, you simply push the stud through a hole, and use pliers to push the prongs down to hold the stud in place. I studded the whole bracelet, leaving about half a finger's length in between each one.
Step 3: To make your bracelet adjustable, take both ends and overlap. Take another piece of cord (about a hand's length) and knot (macrame style) over the ends. Finish the ends by adding beads and knotting the beads in place.
Step 4: Add your charm by opening the lobster clasp and attaching it to your bracelet where ever you want. I'll probably be making more versions of bracelets with the other charms. That's a future project.
Bam! Done.


No comments:
Post a Comment